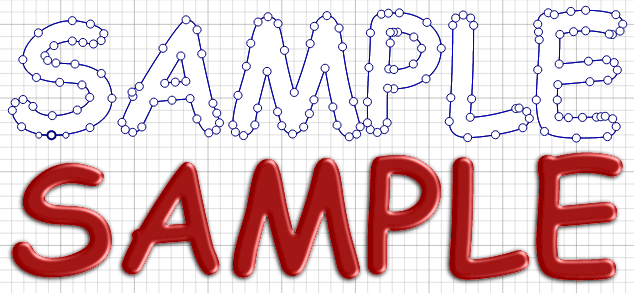
Introduction to YouiDraw Drawing
What is the YouiDraw Drawing
Whether you’re getting started or an experienced designer, Drawing tool is a powerful graphic design solution on web. With vector graphic design in various environment, you have everything you need to express your style and creativity.

System Requirements
Minimum:
Operating System: Windows XP / Mac OS X 10.6 / Linux / Chrome OS
Browser: Chrome 35 / FireFox 30 / Safari 8
Memory: 1 GB RAM
Screen Resolution: 1280*800
Internet Connection: Required for initial use, updates, data sync, login and for help access.
Language: English
Recommended:
Operating System: Windows 7+ / Mac OS X 10.7 + / Chrome OS
Browser: Chrome latest version
Memory: 2 GB RAM
Screen resolution: 1280*800 / 1366*768 or larger
Internet Connection: Required for initial use, updates, data sync, login and for help access.
Language: English
The YouiDraw Drawing interface
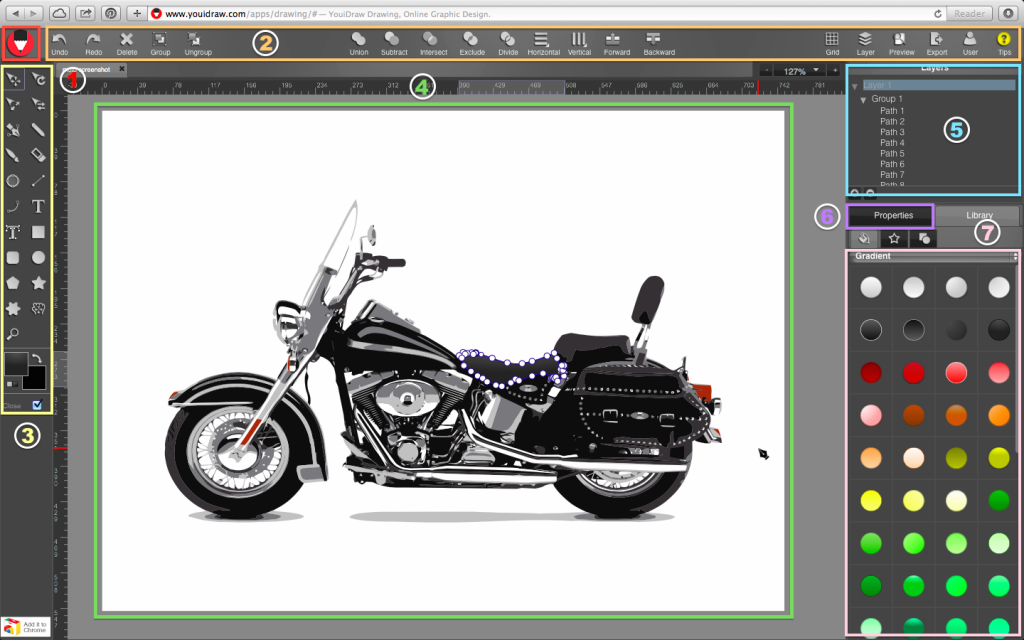
1. File Button 2. Top Function Area 3. Left toolbox 4. Canvas Workspace 5. Layer Tree
6. Shape, Color, Effects Properties 7. Templates and Style Library
• File Button: 
Let you NEW, OPEN, SAVE a project, or import a SVG.
• Top Function Area:
![]() Undo and Redo the your work steps.
Undo and Redo the your work steps.
![]() Delete the selected elements.
Delete the selected elements.
![]() Group multiple selected elements, then you can move them together, or ungroup.
Group multiple selected elements, then you can move them together, or ungroup.
![]() Use combination tools to let multiple shapes change to one special shape, you can union, subtract, intersect, exclude, divide the shapes.
Use combination tools to let multiple shapes change to one special shape, you can union, subtract, intersect, exclude, divide the shapes.
![]() Align multiple selected shapes to left, center, right horizontal, or to top, middle, bottom vertical.
Align multiple selected shapes to left, center, right horizontal, or to top, middle, bottom vertical.
![]() Change the order of selected elements up and down.
Change the order of selected elements up and down.
![]() Show the grid to help you work easier and enable snap to grid function.
Show the grid to help you work easier and enable snap to grid function.
![]() Show or Hide layer tree.
Show or Hide layer tree.
![]() Fullscreen your canvas workspace and preview your design.
Fullscreen your canvas workspace and preview your design.
![]() Export and download your work to SVG / PNG / JPG / PDF …
Export and download your work to SVG / PNG / JPG / PDF …
![]() Log in or Sign out with Google Drive or Dropbox account.
Log in or Sign out with Google Drive or Dropbox account.
![]() Show or hide Tips and get user guide.
Show or hide Tips and get user guide.
• Left Toolbox:
![]()
![]() Select and move, rotate, scale, skew the selected elements.
Select and move, rotate, scale, skew the selected elements.
![]() Pen tools let you add point to draw line and curve and create a special shape as you want.
Pen tools let you add point to draw line and curve and create a special shape as you want.
![]() Pencil tools let you draw a thinner line freeform.
Pencil tools let you draw a thinner line freeform.
![]() Brush tools let you draw a thicker line freeform.
Brush tools let you draw a thicker line freeform.
![]() Use eraser to erase elements on canvas.
Use eraser to erase elements on canvas.
![]() Switch elements to edit mode, then you can edit the point to change the shape and path.
Switch elements to edit mode, then you can edit the point to change the shape and path.
![]() Draw a straight line on canvas.
Draw a straight line on canvas.
![]() Draw a curve arc on canvas.
Draw a curve arc on canvas.
![]() Add a text on canvas workplace.
Add a text on canvas workplace.
![]() Import text path with local fonts by “text path” button on toolbar.
Import text path with local fonts by “text path” button on toolbar.
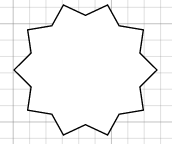
![]() Add rectangle, rounded rectangle, ellipse, circle, convex, concave and gear shapes.
Add rectangle, rounded rectangle, ellipse, circle, convex, concave and gear shapes.
![]() Canvas move.
Canvas move.
![]() Zoom in and Zoom out.
Zoom in and Zoom out.
 Fill color and stroke color.
• Canvas Workspace:
In the center of the YouiDraw Drawing interface is the workspace. This workspace shows your
vector shapes, text, and other elements visually, just as they will be displayed as they will
appear in a browser.
• Layer Tree:
At the top-right corner of YouiDraw Drawing interface is the layer tree. This area you can select
elements and use layers to manage the elements, one layer is one separate area on canvas.
• Properties
Basic properties:
Set shapes special parameter and basic style, such as fill color, gradient, pattern,
and stroke size, style etc,.
Text properties:
Choose fonts, text size, set bold, italic, underline, strikethrough, etc,.
Transform, Arrange and order:
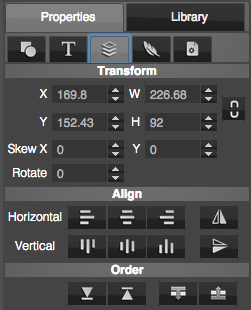
Set elements position, width, height, rotate, skew, flip, arrange multiple elements, and change the
order for selected elements.
Filter Effects:
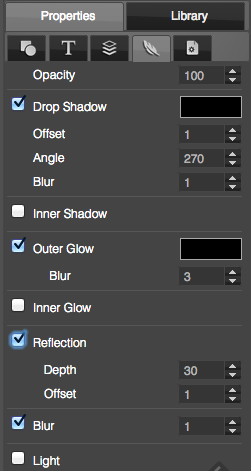
Set opacity and set Drop Shadow, Inner Shadow, Outer Glow, Inner Glow, Reflection, Blur and
Light filter effects.
Project settings:
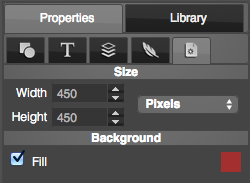
Set the size of canvas, and set background fill color, gradient or pattern.
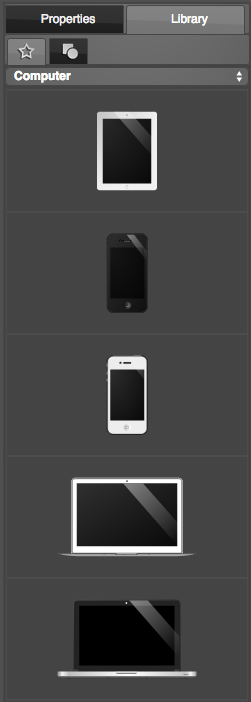
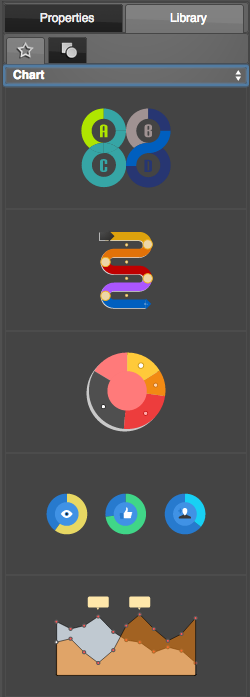
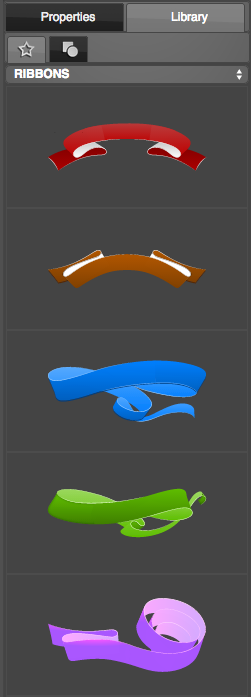
• Template and Style Library
Style Library:
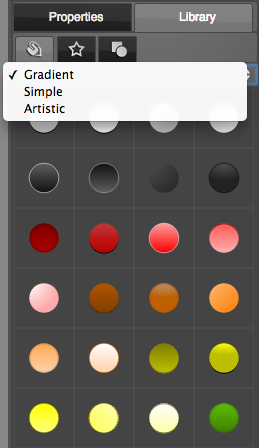
You can find and open library at the right-bottom corner of YouiDraw Drawing interface. You
have hundreds of different style to apply, include gradient, simple and artistic styles.
Shape Library:
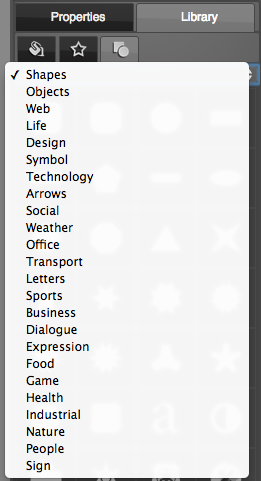
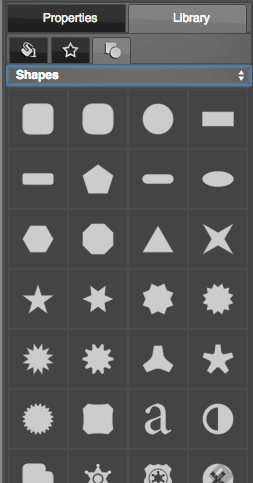
Many different kinds of shapes and basic icons you can use to create your work quickly.
Template Library:

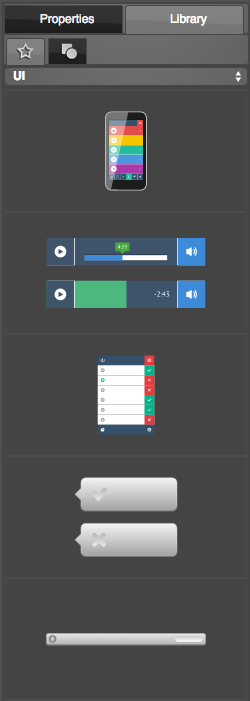
Templates graphic will improve your work and help you to get high efficiency
Open source components
- Thanks the Logo idea from Dribbble user Mike Smith (Guerrilla).
- jQuery dropdown: Copyright 2013 Cory LaViska, LLC. Licensed under the MIT.
- icomoon.io Free SVG Package Licensed under the GPL / CC BY 3.0
- Purchased Commercial License SVG from tooopen.com & graphicstock.com
- Pricing Table Copyright (c) 2013 Thibaut Courouble. Licensed under the MIT.
- Ownbusinesscard.net provided few ideas for example.
- Other open source modules: jQuery / jQueryUI / jQuery SVG / jgraduate / jPicker / canvg / colorpicker / Opentype / Paperjs / jSize / jqtree / perfect-scrollbar / w2ui
Getting Started
Create a new Project

Once you’ve opened the web app in your browser, the web app will new a default blank project. But you also can creating new documents by click the logo button and selecting NEW from the menu.
![]() ps: If you want to save your work into your Google Drive or Dropbox, you need login first by click USER/Sign in button at the right of the top function area.
ps: If you want to save your work into your Google Drive or Dropbox, you need login first by click USER/Sign in button at the right of the top function area.
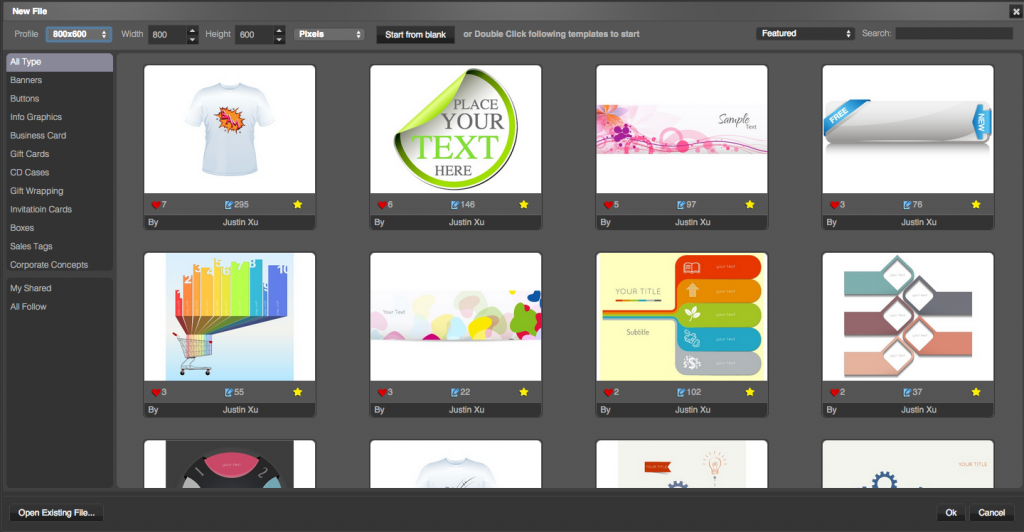
The NEW FILE dialog: You can choose a environment template to create your project or just set the Width and Height to create a blank project.
Open an existing file (YouiDraw Drawing files only): You can choose a file from your local drive, or Google Drive and Dropbox when you login by these service account.
Set up your Environment
1. The Grid button on the Top Function Area:

Show grid on the background with spacing settings.
Enable “snap to grid” option to lets you position elements along the same horizontal or vertical lines.
2. Project Settings under Properties tab:
Set documents canvas width and height by pixels, inches, cm or mm units.
Set background style by color, gradient or pattern.
Add Shapes or Elements
1. Add a shape by Pen tools :
Click the pen tool ![]() in the left toolbox, and click on canvas to add point, drag to add a curve point, finally click the first point to complete the shape.
in the left toolbox, and click on canvas to add point, drag to add a curve point, finally click the first point to complete the shape.

2. Add a shape by Shape create tools :
Click ![]() rectangle, round-rectangle, ellipse, convex, concave, gear shape create button, and click and drag mouse on canvas to create a shape easily.
rectangle, round-rectangle, ellipse, convex, concave, gear shape create button, and click and drag mouse on canvas to create a shape easily.
Adjust Elements and choose a Style
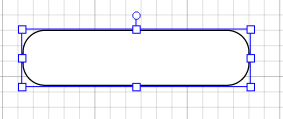
1. Adjust elements by move, rotate, scale, skew tools:
Select an element, then click these tools ![]()
![]() in the left toolbox, then you can click and drag mouse on canvas to adjust this selected element.
in the left toolbox, then you can click and drag mouse on canvas to adjust this selected element.
2. You also can adjust elements by using Transform settings in Properties tab:
Select an element, then switch to Transform settings under Properties tab, then you can change the position, width, height, skew and rotate just by an exact value.
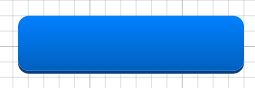
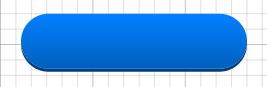
3. Choose a quick style from style library:
Select an element and click the Library button at the right-bottom corner of interface, then you will find hundreds of styles you can choose, just click it and apply on the selected element, you will get a wonderful style quickly!
Change or Copy Style and Properties
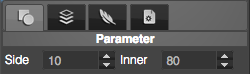
• Shape Parameter:
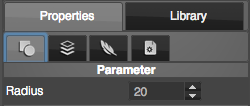
When you add a shape by shape create tools, you can adjust the shape by shapes parameter, different shapes with different parameter settings. You can change “radius” for round rectangle, change “side” or “inner” for concave, gear or convex shapes.
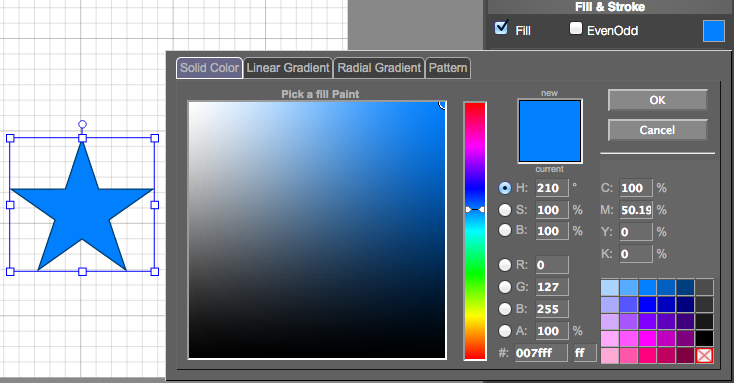
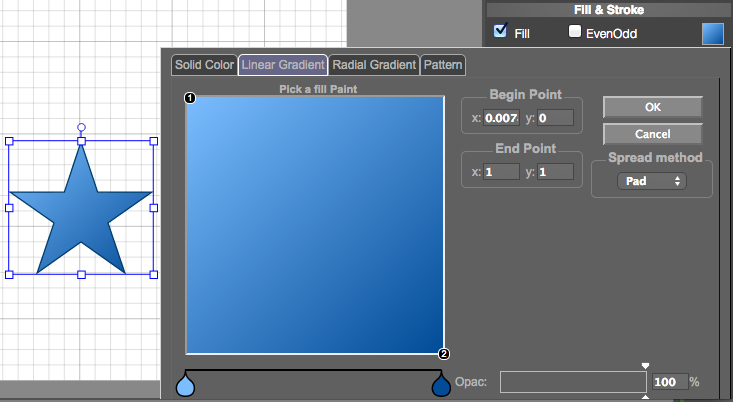
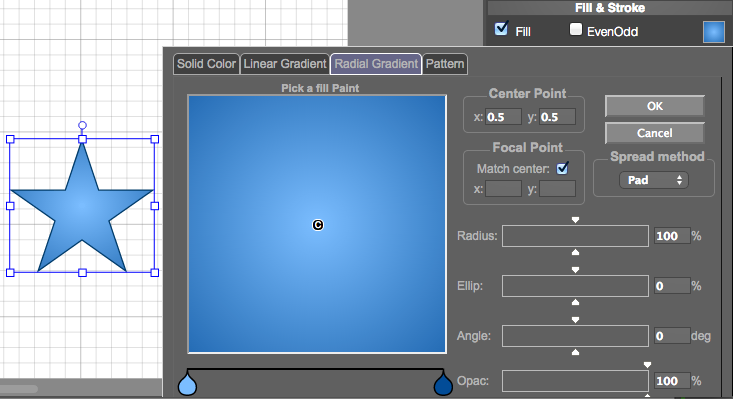
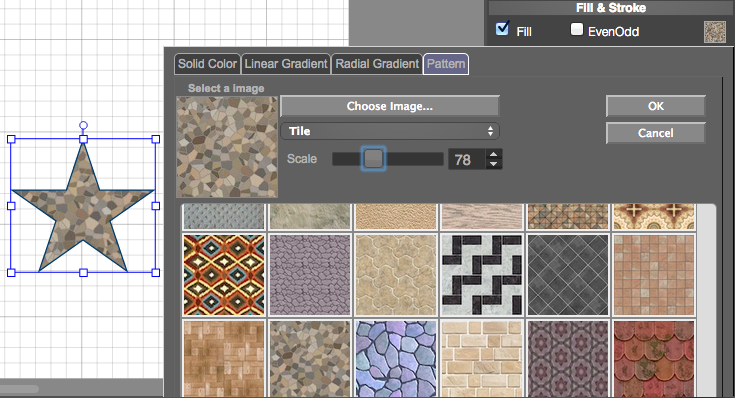
• Fill (Solid Color, Gradient and Pattern):
Solid Color: You can pick a solid color for an element by a standard color panel. The solid color support HSV, RGBA, and HEX color code.
Linear Gradient: Set linear gradient for an element by multiple colors. You can change the direction, distance of colors, and set spread method to pad, reflect or repeat.
PS: ![]() Click the color line to add a color, double click on the color sign to edit the color, and click and drag the color sign to far from the line to remove a color.
Click the color line to add a color, double click on the color sign to edit the color, and click and drag the color sign to far from the line to remove a color.
Radial Gradient: Set radial gradient for an element by multiple colors. You can change the position for center point and focal point, change the value of radius, ellipse, angle and opacify and set spread method to pad, reflect or repeat.
Pattern: Choose a pattern from library or just choose a image from your local disk drive.
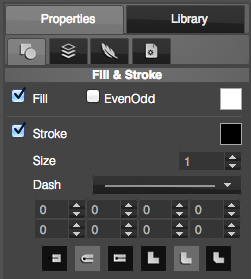
• Stroke
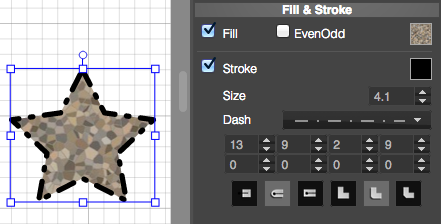
You can show stroke for an element and set color, size, and dash style for it, make a special stroke for your elements.
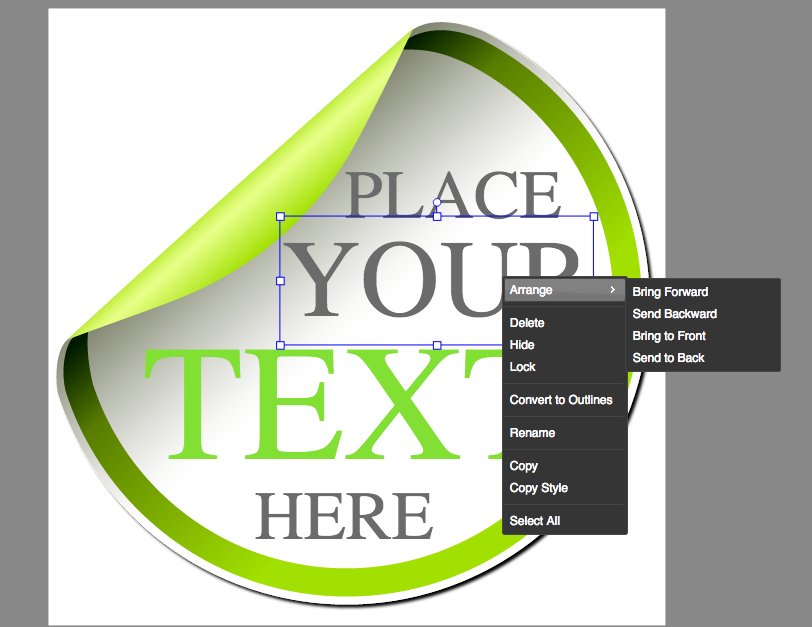
• Copy style from other one to another element
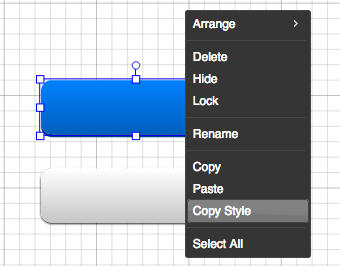
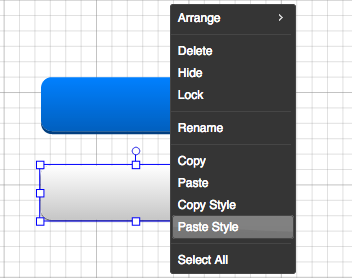
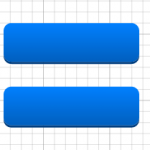
An easier way to copy style from one element to another, select an element and copy style from the context menu, then select another element and paste style from the context menu, finally you can got same style to an element quickly and easily.
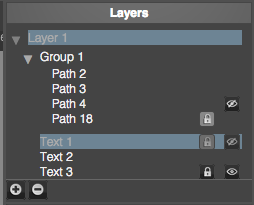
Understanding layers
At the top-right corner of YouiDraw Drawing interface is the layer tree. This area you can select elements and use layers to manage the elements, one layer is one separate area on canvas. And you can hide/show or lock an element.
If you want to select a element, you need to select that layer at first.
Keyboard shortcuts
“←”: Element to left for 1px
“Shift+←”: Element to left for 5px
“↑”: move Element to up for 1px
“Shift+↑”: move Element to up for 5px
“→”: Element to right for 1px
“Shift+→”: Element to right for 5px
“↓”: Element to down for 1px
“Shift+↓”: Element to down for 5px
“Delete”: Delete
MAC OS X
Shift+Command+Z: “Redo”
Command+Z: “Undo”
Command+C: “Copy”
Command+V: “Paste”
Command+X: “Cut”
Command+S: “Save”
Command+O: “Open”
Command+N: “New”
Command+Esc: “Cancel Edit text or select toolbox select tool(toolbox)”
Windows / Chrome OS
Control+Z: “Undo”
Control+Y: “Redo”
Control+C: “Copy”
Control+V: “Paste”
Control+X: “Cut”
Control+S: “Save”
Control+O: “Open”
Control+N: “New”
Control+Esc: “Cancel Edit text or select toolbox select tool(toolbox)“
Create and Modify Content
Use Pen tool
Pen tools let you add point to draw line and curve and create a special shape as you want.
1. Click the pen tool ![]() in the left toolbox.
in the left toolbox.
2. Click on canvas to add point. ![]()
3. Click and hold to Drag to add a curve point. ![]()
4. Add more point or click the first point to complete the shape. 
5. Finally, just click on the canvas, then complete draw. 
Use Pencil tool
Pencil tools let you draw a thinner line freeform.
1. Click pencil tool in the left toolbox. ![]()
2. Click and hold mouse on the canvas and drag to draw a link freeform. 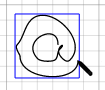
3. Then release mouse click, you will get a line. 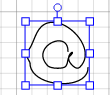
4. Finally, you can use stroke style setting to edit the line: 
Use Brush tool
Brush tools let you draw a thicker line freeform.
1. Click Brush tool in the left toolbox. ![]()
2. Click and hold mouse on the canvas and drag to draw for free. 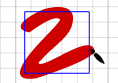
3. Then release mouse click, you will get a thicker line. 
4. Finally, you can use basic stroke style settings to edit it. 
Draw a straight line
Draw a straight line on canvas.
1. Click line tool ![]() in the left toolbox.
in the left toolbox.
2. Click and hold mouse on the canvas and drag to create a straight line. ![]()
19 of 273. Release mouse click, you will get a straight line. ![]()
4. Finally, you also can use stroke style settings to edit the straight line. ![]()
Draw an Arc or Curve
Draw an arc on canvas.
1. Click arc tool ![]() in the left toolbox.
in the left toolbox.
2. Click and hold mouse on the canvas and drag to create an arc. ![]()
3. Release mouse click, you will get an arc. 
4. Finally, you also can use stroke style settings to edit the arc. ![]()
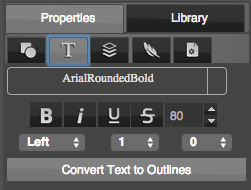
Add Text
Add a text on canvas workplace.
1. Click text tool ![]() in the left toolbox.
in the left toolbox.
2. Click mouse on the canvas, you will get a default text. ![]()
3. Choose a font from the font list in the text properties settings. ![]()
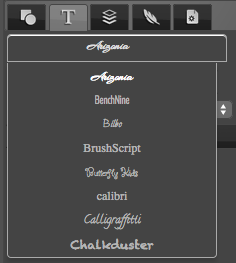
4. We can choose text size, set bold, italic, underline, strikethrough, and change text align, line space and letter space in text settings.
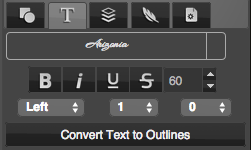
5. Finally, we also can use basic style settings or just choose a style to get change.
Insert text path with local fonts
1. Click “text path” button ![]() on left toolbar.
on left toolbar.
2. Then you can click “Choose File” button on “import text path” dialog, and choose an font from your local disk drive. (Not all fonts can import, may some font can’t support).
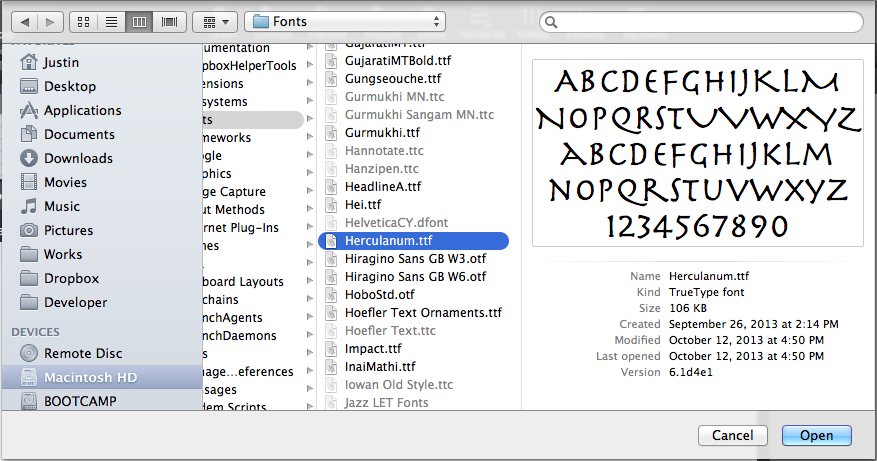
3. You can type the text and change font size after you choose a font. Then click “Import Text Path” button.

4. You can edit the text or just choose an style easily.
Add Shapes
Add shapes by shape create tools quickly and easily.
1. Click one of the shape tools ![]() which you want to create.
which you want to create.
2. Click and hold mouse on the canvas and drag to create the shape. 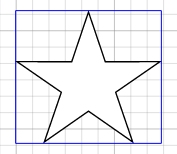
3. Release mouse click, the shape will be created. 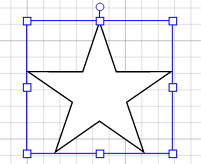
4. Use the shape parameter setting to change the shape.
5. Choose a style from style library. 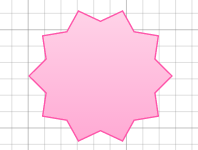
Use Path edit tool
Because this is the vector graphic design, so you can edit elements by edit the path point.
1. Double click on an element or click edit button ![]() on left toolbox.
on left toolbox.
2. Click on the path to add a point. 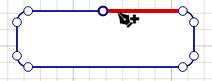
3. Click on the point and drag to move it, you also can choose multiple point and adjust them together. 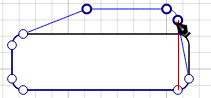
4. Double click on the point to switch the point to curve point. 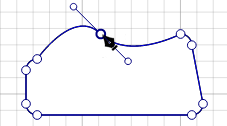
5. Drag the curve adjust point to adjust two point together. And press Command(mac) or Control(windows) key and drag the point to adjust only one side curve. 
6. By this way, you can create any special shape that you want. 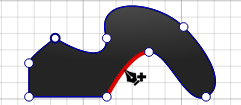
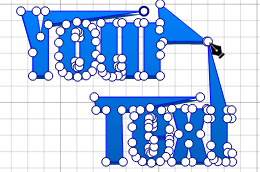
Change Text to Outlines and Edit it
1. Right click on a text, choose “Convert to Outlines” option in the context menu. Or just click “Convert text to Outlines” on Text properties tab.
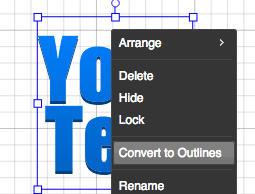
2. Double click on the text or click edit button on left toolbox, then edit it.
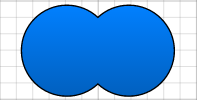
Use Combination Function
Combination function to let multiple shapes change to one special shape, you can union, subtract, intersect, exclude, divide the shapes.
![]()
Union: 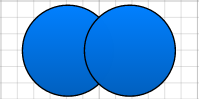 ->
-> 
Subtract: -> 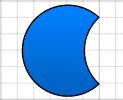
Intersect: -> 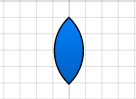
Exclude: -> 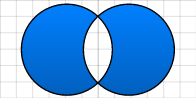
Divide: -> 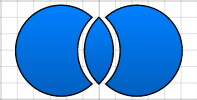
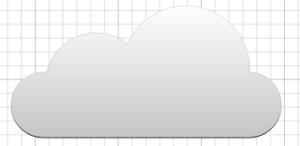
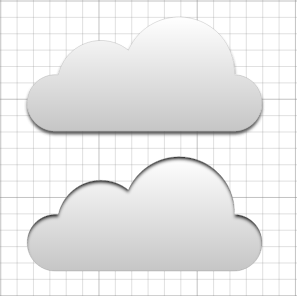
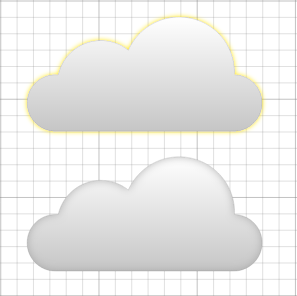
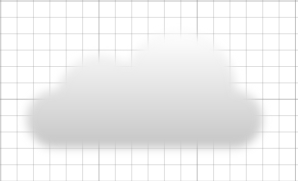
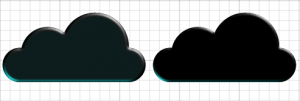
eg. Create a Cloud Logo:
1. Add 3 shapes, 2 different circle and 1 round rectangle, place like this:
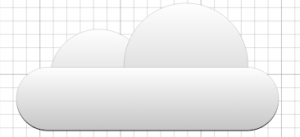
2. Select all the 3 shapes, and click union button:
Advanced eg. :
Use Filter and Effects
Drawing provide many filter and effects you can use for elements.
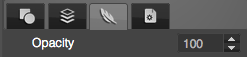
• Opacity:
Set transparent for elements.
• Drop Shadow and Inner Shadow:
Set shadow color and use offset, angle, blur value to change the shadow style.

• Outer Glow and Inner Glow:
Set glow color and use blur value to change the glow style.
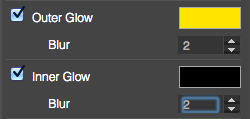
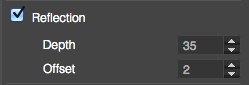
• Reflection:
Enable reflection for an element, use depth and offset value to change the style.

• Blur:
Make elements blur
![]()
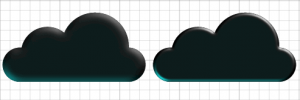
Use Light Effects
Light effect is a special filter for SVG vector graphic.
The software provide some settings let you set light effects easily. You can find the light settings at the last in filter effect tab, just click the rect button to open light settings panel. You can set 3 different light onto your elements to get more amazing artistic effect.
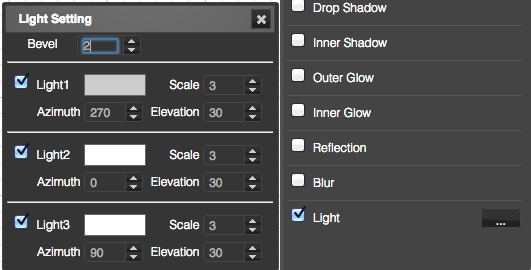
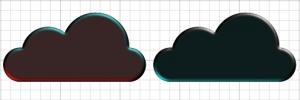
Bevel 5 VS Bevel 2:
Different Light Color:
Light Scale 3 VS Light Scale 1:
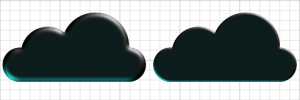
Distant Light Azimuth: 0º & 180º VS 90º & 270º:
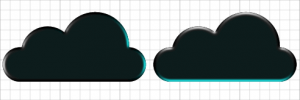
Distant Light Elevation: 40 VS 20.
Insert and edit SVG or Image
If you already have a SVG or image file, and need to edit, add style and effects, combine with other shapes, you can insert SVG / Image into YouiDraw Drawing.
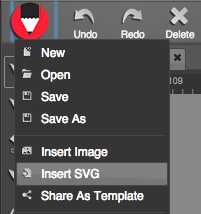
1. Click File button and choose “Insert SVG” / “Insert Image” option.
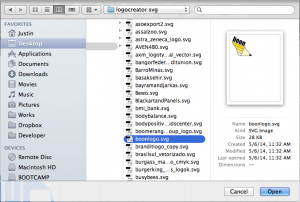
2. Choose an SVG or Image file from your local disk drive, and click open.
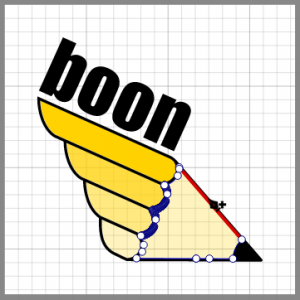
3. Finally, the SVG or Image file will be put into your canvas workspace, you can edit, resize etc,.
Download and Save your work
Download works with free account
Preview:
Click preview button ![]() on the top function area, then you can preview your work on full screen.
on the top function area, then you can preview your work on full screen.
Export:
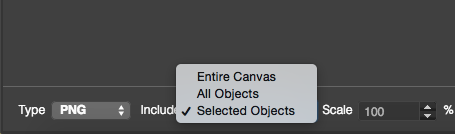
Click export button ![]() on the top function area, then you will open export settings dialog. You can export to png, jpg format. Default size are your project size, but you can use scale option to change to any size you want. You also can choose export entire canvas or just selected elements.
on the top function area, then you will open export settings dialog. You can export to png, jpg format. Default size are your project size, but you can use scale option to change to any size you want. You also can choose export entire canvas or just selected elements.
PS: SVG and PDF vector format only can be export under Premium Account.
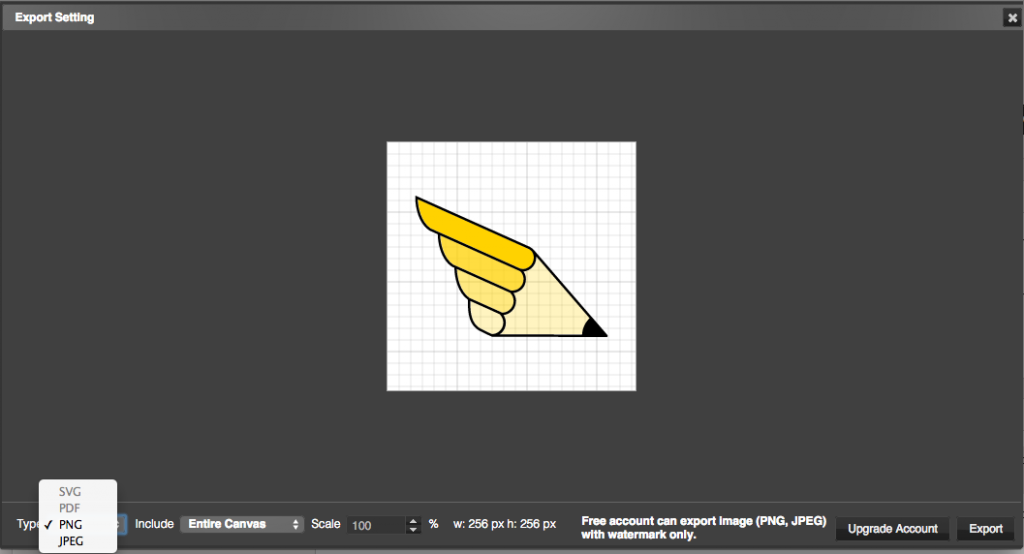
If you want to export your design with transparent background, please select include “All objects” or “Selected Objects” option.
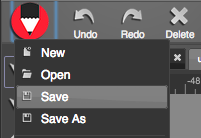
Save works to Cloud or Local drive
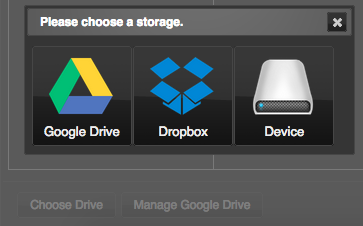
Save your works into Google Drive / Dropbox to a .ydr project file. You can open and edit it anywhere.
1. Click File button and choose “Save” or “Save as” dialog.
2. If you connected Google Drive, you can choose an directory and fill in your file name, then Click OK.
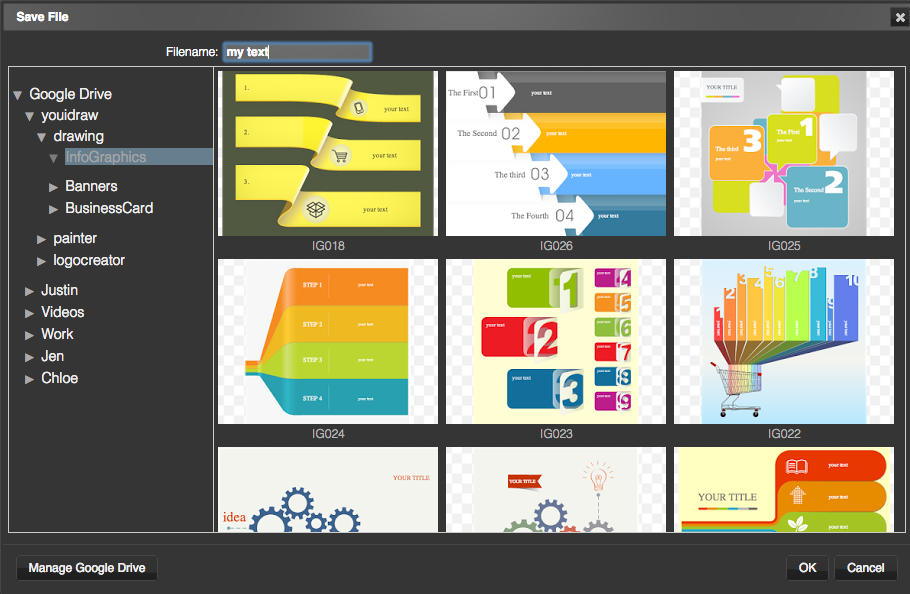
3. You also can click “Choose Drive” button (left-bottom corner), then you can choose save file to Google Drive, Dropbox or your local disk drive.
But Safari can’t support Save to Local Device right now.
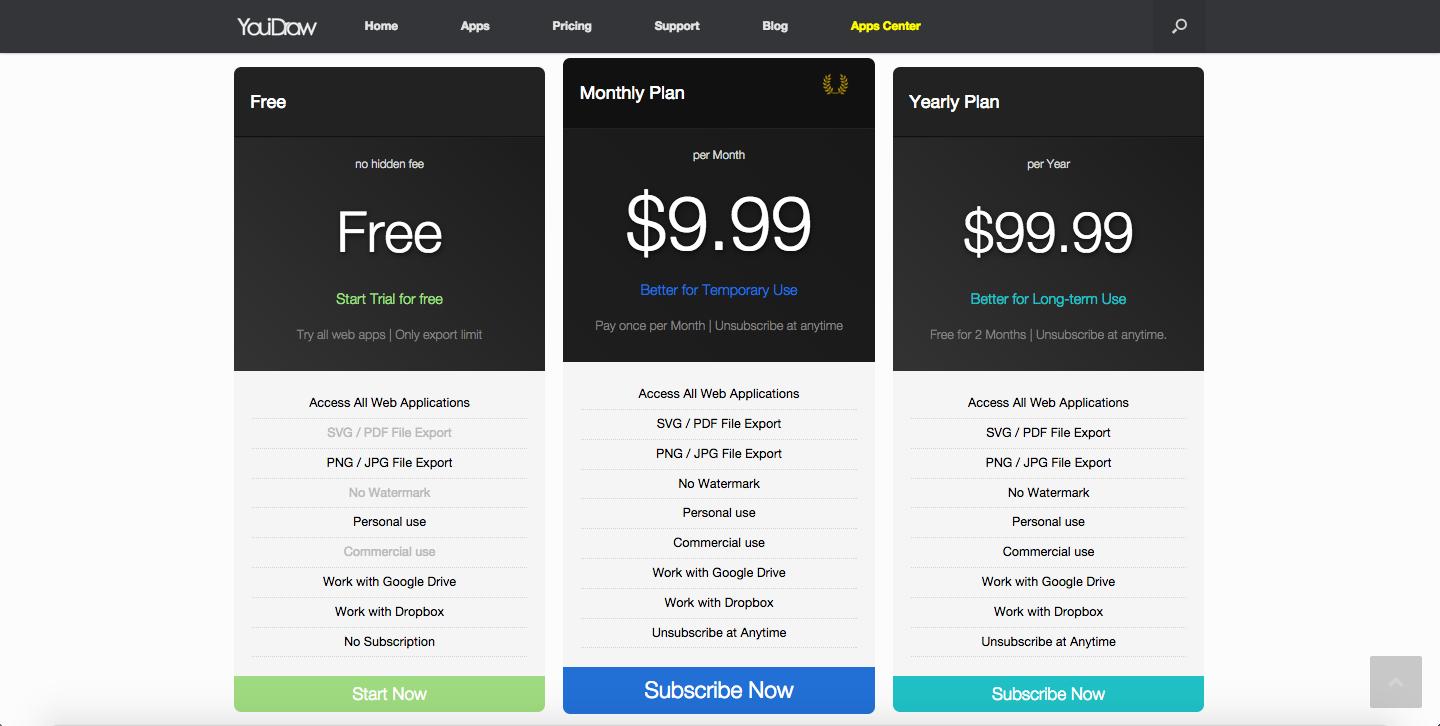
Upgrade to Premium Account
If you login by free account, may you can’t export to SVG vector format, you need to upgrade to premium account to enable this function.
1. Visit our website homepage: https://www.youidraw.com/
2. You can find a “PRICING” link on the main menu, click it to visit Pricing List page.

3. You can subscribe our monthly or yearly plan to get unlimited function. (You can unsubscribe at anytime.)
Release Note
Release Notes
2015.4.18
1.add login with email function.
2.project file can save to youidraw drive.
2015.3.19
1.fix a bug of can’t export multi-layer SVG file.
2.change drive icon.
2015.2.11
1.select multiple nodes when press shift key, support arrow key select(up,down..)
2.fix node layer change bug when group/ungroup,union/subtract.
2015.1.27
1.fix maximum is 100(up to 1000) files when show google drive.
2.fix some project can’t open after save(long length number can’t open after compress it).
3.fix bug of open from google drive don’t have waiting screen.
4.fix set group color/border bugs.
5.fix close all projects UI issue.
2015.1.16
1.change canvas size by project setting
2.fix bug of align node function does not work
3.refresh file list after save, save as, when reopen file dialog.
4.add shot cut of save as press ctrl/cmd+shift+s.
2015.1.5
1.support font bold,italic,underline, line through when export image.
2.add variants option of font.
3.set ‘Arial’ as default font
4.add more more(200+ ) google fonts.
5.fix can’t sign in bug(sign window was blocked when save).
6.fix bug of can’t save file sometimes.
2014.12.26
1.add paypal subscription.
2.show tip when fail to open file from google drive.
3.fix auto login bug.
4.fix user’s information wasn’t update bug.
2014.12.19
1.add google font ‘Forum.ttf’ etc.
2.add sign, loading, saving, waiting screen.
3.add modified state on toolbar tab.
4.add open and download file in local device function.
2014.11.20
1.drive files can order by time and name.
2.click empty space to clear current select node.
2014.10.28
1.add sign in with Dropbox, Microsoft and Facebook.
2.add save and open file from Dropbox and local device.
3.change file extension name, .yid to .ydr, .yil to .ylc.
4.popup a window to save when export file.
2014.9.19
1.fix use keyboard to change node position does not work.
2.remove some unnecessary scroll-bar in export and drive-file dialog.
3.change save tip when close a project, now have three buttons to choose.
4.fix sometimes when opened app closed, Start now button does not work.
5.don’t support IE.
2014.9.13
1.export entire always have a background.
2.remove watermark when preview export image.
3.reduce area of watermark.
2014.9.6
1. Fixed text position incorrect after google font loaded.
2. Fixed web font does not work when use https.
3. Fixed text position incorrect when edit it.
2014.9.4
1. Changed stroke width range to 0.1 ~ 50.
2. Fixed bug when cancel select font file in import text path function.
3. Fixed IE has bug in export, content disappear.
2014.9.3
1. Shape flip(h & v), when drag it.
2. Added horizontal and vertical flip button.
3. Enter to change group size, optimize drag operation.
4. Optimized align grid function.
5. Fixed group undo position incorrect.
2014.8.25
1. Fixed bold italic status of text bug.
2. Invoice display issue when have discount.
3. Fixed account information incorrect after paid.
4. Added manage google drive button.
5. Resize fullscreen dialog when window size changed.
6. Fixed alpha of color and gradient bug.
2014.8.22
1. Fixed web-font export does not work when export png.
2. Fixed some time save project to google drive failed bug.
2014.8.18
1. Fixed current drive folder change when press key/up when edit node position.
2. Changed project thumbnail to png with transparency.
2014.8.14
1. Free user added watermark when export.
2. Fixed some bug of Insert SVG function.
3. Fix group’s children can’t copy bug.
2014.8.11
1. Added copy, paste to context menu.
2. Prevent copy fill pattern when add new node.
3. Added Insert Image in file menu.
3. Fixed drawing toolbox pattern button size bug
4. Fixed a bug of can’t export image pattern.
2014.8.10
1. Fixed menu does not work after use google translate.
2014. 8.7
1. Fixed color dialog is invisible,let it moveable.
2. Added lock, visible button on node tree and node list.
2014.8.6
1. Freehand point support multi-select and operation.
2. Add rename item to context menu
3. Press ctrl+R and Return key to rename and edit and end edit
4. Click edit button for text show convert to outlines tips.
5. Auto calculate price when use coupon code
2. Show account type in account information dialog
2014.8.01
1. Fixed can’t drag shape to canvas bug
2. Added export to PDF and print function
3. Start app, when log in success, click Ok button to continue
4. Add project preview page.
2014.7.29
1. Fixed design bug of shape combine. fix bug of divide.
2014.7.28
1. Updated share file dialog, need input name, select type.
2. Added home page, user guide link to apps
2014.7.24
1. Fixed fill pattern bugs and fill dialog function.
2. Set export jpeg image quality
3. Added more setting to grid
4. When scale canvas (drag freehand point) need scale some appropriate,add line to rotate point
2014.7.23
1. Find inner shadow export bug(chrome bug), fix it
2014.7.19
1. New file in specify fodder from google drive
2. Add save as function
3. Add replace share function
2014.7.11
1. Show rotate,position,size data when drag in canvas
2014.7.10
1. Check project when share it, no content show on canvas can’t be shared.
2. Added download browser icon.
2014.7.8
1. Erase every thing in current layer, try fix crush bug.
2. Fixed hard to select only has stroke shape, like line, arc..
2014.7.2
1. Fix import large svg can’t save and open file
2. Show context menu when edit shape, remove pt, close shape,convert bezier
2014.6.28
1. Fixed time is not suit or error in firefox and safari
2. Painter: fixed bug of rect does not hide when use pen
3. Added custom cursor, when select tool